
Minecraft is one of the best gaming options for customization. However, it becomes tough to develop unique ideas in a vast section. As a result, the internet comes with a massive collection of Minecraft skins, which helps to personalize the gaming experience through download and installation. We will discuss this, but before that, you should consider Skindex as the best and most popular option below.
What Is Skindex?

It is the massive collection of community-created Minecraft skins. People can download, upload, and at the same time share their creations with others. Also, it is a safe way to get new Minecraft skins from the official website. Let’s get more information from the following.
It offers are the most common and celebrated customization options inspired by YouTubers, Superheroes, and many others. You can see the list of the best Minecraft skin characters below if you are ready to take a quick pick.
But, if how to download and install is your main issue, don’t worry about that. You can quickly learn to download and install Skindex in Minecraft from this article. So, stay tuned and read the following.
Steps To Download & Install Skins For Minecraft
Many community-based websites are open that allows you to get more than thousands of Minecraft skins for free. We are moving forward with the minecraft skin platform, a suitable option for all users.
- Visit the Minecraft Skindex homepage and hit the skins you like to start with. We are moving forward with the Skeleton Gamer skin for our blog. You can search for your specific character from the search box as well.
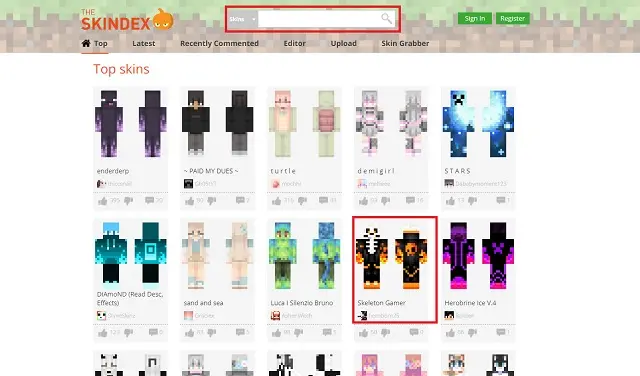
Image source → Beebom
- After choosing a skin, you will get a new page with many options to export the skin. Search for a “Download” option in the right menu and go further.
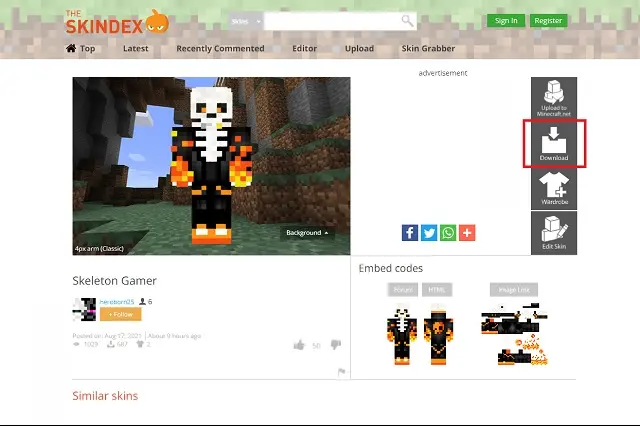
Image source → Beebom
- It helps to download a PNG file to your desktop, and you will get it in your downloads folder. But, consider that it is a low-quality PNG file.
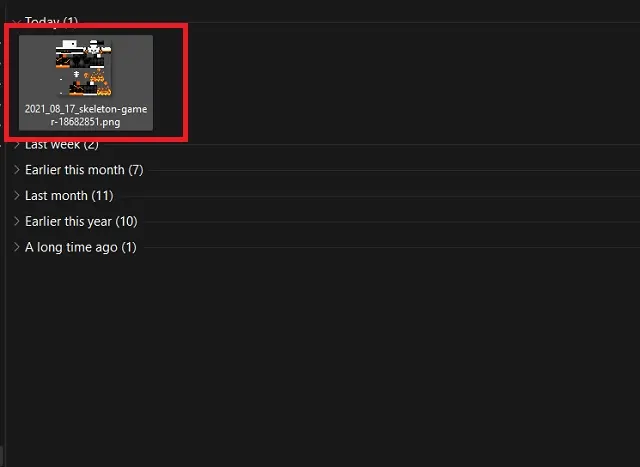
Image source → Beebom
- Go to the Minecraft official website and move further with a “Profile” option. On the home screen, you will see your character, and below that, you will find the Profile option.
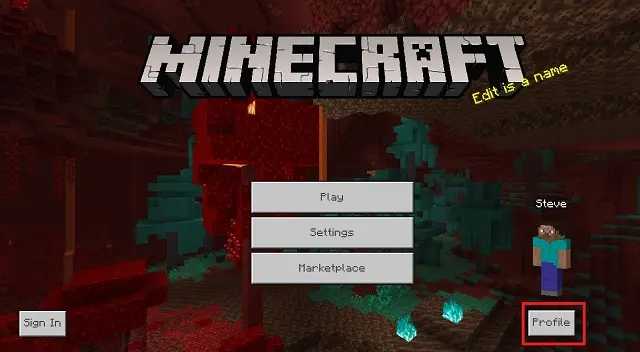
Image source → Beebom
- By clicking, you will see the character options screen. You have to choose one character to apply your skin. After this, click on the “Edit Character” button.
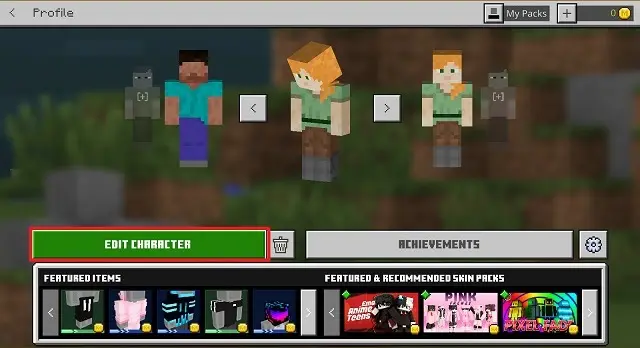
Image source → Beebom
- Go to the “Second Tab” present on the top of the left side and open your skin options. You will get the “Owned” part here. Now you have to click on the “import” options after the “Choose New Skin.”
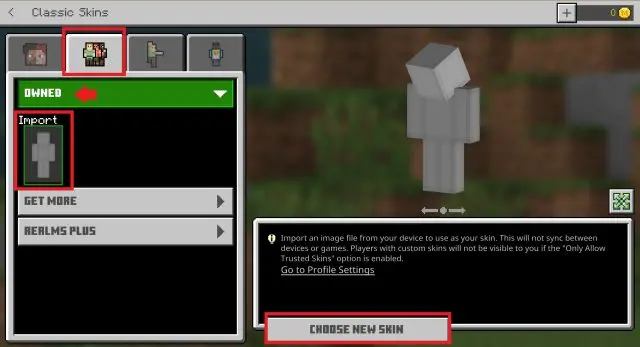
Image source → Beebom
- You will see the open window of Window Explorer. Now, open your download folder and choose the PNG skin file. You can press the “Open” option to load the skin.
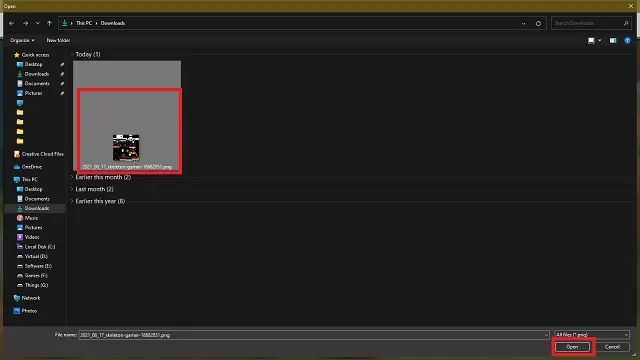
Image source → Beebom
- Here, you can select the classic or slim model type. The difference in both of them is the width of the arms. It will help you load your skin into Minecraft; you will be set to play the game with the same Minecraft characters.
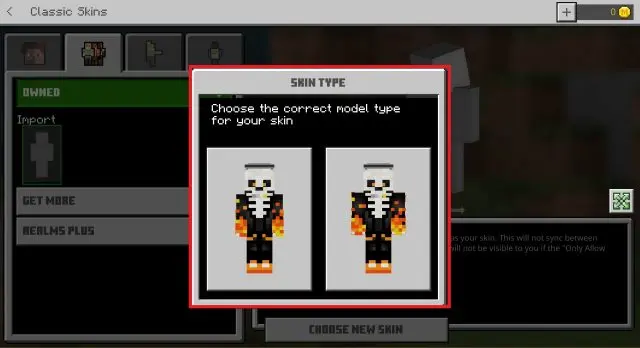
Image source → Beebom
So, in this way, you can download and install skins for Minecraft. But, do you know what makes it more exciting? You can change the skins of Minecraft characters. See the following steps to changing a Minecraft skin.
How To Change Minecraft Skin with skindex?
It offers many Minecraft skins, and these are made by various users. So, you can rely on the below steps to change Minecraft skin using Skindex.
- First, download the skin and go to the official website of Minecraft.
- Press on “Log-in” at the top of the right corner of the page.
(You can go with Mojang or Microsoft Account to log in.)
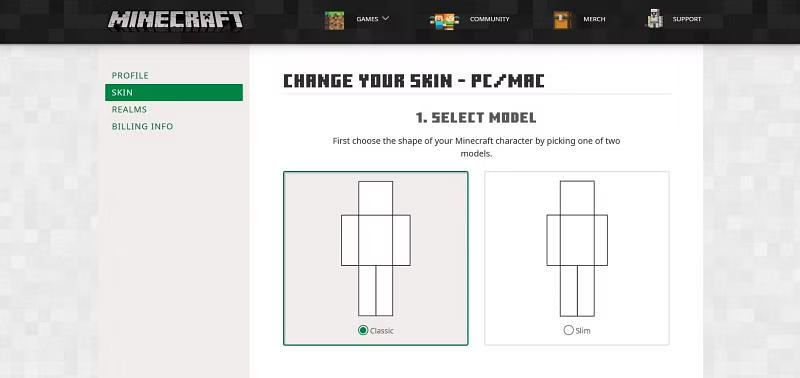
- Click the “Skin” tab, left of Profile.
- You can choose between “Slim” and “Classic.”
- Now, hit the “Upload Skin” and check your download folder for the skin files.
- At last, you have to choose the file and upload it on the website.
You can see the loading after following these above steps. Sometimes, you can see immediate changes, and sometimes it may take a few minutes to process. Now, you can close and re-open the Minecraft website to see your changes in skins.
Conclusion
Minecraft is one of the popular sandbox gaming websites. Players can easily play their games by going on a website. This article will guide you about how to download and install the Skindex in Minecraft (Working).
Along with that, you can learn to change Minecraft skin using Skindex. We hope you need this type of article and this article may prove helpful to you.
VLM STAFF
Chloe Blake
Senior News Writer at Voice Life Media
Howdy, I'm Chloé Blake, a writer, and a little bit multimedia content creator.I run "Voice Life M...


